Monday, April 23, 2012

Starburst Tutorial with Epiphany Shape Studio Pennant Tool

Hi Everyone! Thanks for stopping by this Monday morning. I have a little tutorial today. Over the weekend, I was creating with my Epiphany Studio Tools and created a fun new embellishment.  It is quick & easy, and an easy, new way to use any type of pennant punch. You will need:

Epiphany Shape Studio Pennant Tool {or any other type of pennant punch}
Epiphany Vintage Setting {or a large button}
6 Small glue dots {I used Thermo Web Memory Zots}
1 Medium or Large glue dot {also by Thermo Web}
4 x 6 patterned paper scrap

Punch 6 pennants from patterned paper.
Attach 1 small glue dot to the end of each pennant, and attach it to the back of the EC Vintage setting {or large button}.
Continue to add the other 5 pennants to the back of the setting with the small glue dots.
Finish by adding a medium glue dot to the entire setting to attach it to your project.
I also added a small round EC setting to the middle of the vintage setting. If you use a large button for the center of your starburst, you will not need to add this small embellishment.
After I made the startbursts, I also starting punching small circles & scallop circles with the EC Shape Studio Circle tools. I also arranged these on the back of the vintage settings to create a few different embellishments.  

I am sure if you play around with your punches for just a little bit you will be inspired to create a new embellishment from just a few scraps of paper. {The above starburst was created with an EC Shape Studio Circle tool, with the ends of the circle folded in to show the backside of the patterned paper.}
Have your ever created a fun & new embellishment using a tool in a new way? Tell me about it! And have a great Monday!


Sunday, April 22, 2012

Winner! Winner!


Shannon b!!! You are the winner of my goodies box with this comment:
enjoy seeing all your scrapbook pages & albums posted here lately. You've obviously caught the bug again! I love mini albums too. Which reminds me, I have a partially finished mini album that I need to complete!
April 19, 2012 7:02:00 PM CDT

Please email me @ kimbgarner{at}yahoo{dot}com. And I will send you some yummy crafty supplies!

Thursday, April 19, 2012

Baseball Mini Album. Done. {& Blog Giveaway}

 There are so many things that I love about mini-albums.
First, the greatest thing about creating a mini-album is it is finished. DONE. Finito. Like so much other creating {scrapbooking}, you are always taking photos and life continues being an amazing adventure so the scrapbooks are never 'caught up'. But a mini-album you can gather pictures from one event or theme, gather a few supplies, embellishments, & tools; then create for a few hours and cross the finish line. Yay!
 Second, I love the SIZE of a mini-album.  They are small and easily accessible & they welcome people to look through them. Have you ever really dragged out your 12x12 albums for anyone to look at? Lugging those books out only happens once in awhile with the family or friends, except if you are my dad, bless his heart, he always looks through them when he comes to my home.  My kids always go to mini-books because they are the perfect size for little hands and I keep them all accessible throughout my house in baskets, at the coffee table, in bookshelves, or on display in their rooms.
 Third, they make the perfect handmade gift. I have never seen a mini-book or photo album gift opened without a big smile of excitement and usually a few tears {especially from the adults}. This is a gift that doesn't have to take much time, but can pull off some great results in the gift department.
 I have just a few suggestions for completing a mini-album. Keep supplies & photos to a minimum. First gather the pictures for the subject of your album. {Instagram + mini-album = priceless, but that is a whole different post} If it is a trip, then take the highlights. Don't get overwhelmed with too many photos. Pick the best ones, where you want to tell the story of the trip. If it is one person or family, the pictures can span many years or a certain timeline. Gather supplies that fit the theme of your album. Again, pick papers & embellishments that give you choices, but not a large amount that then you can't decide and finishing is still the end goal. Also gather the tools you will need.
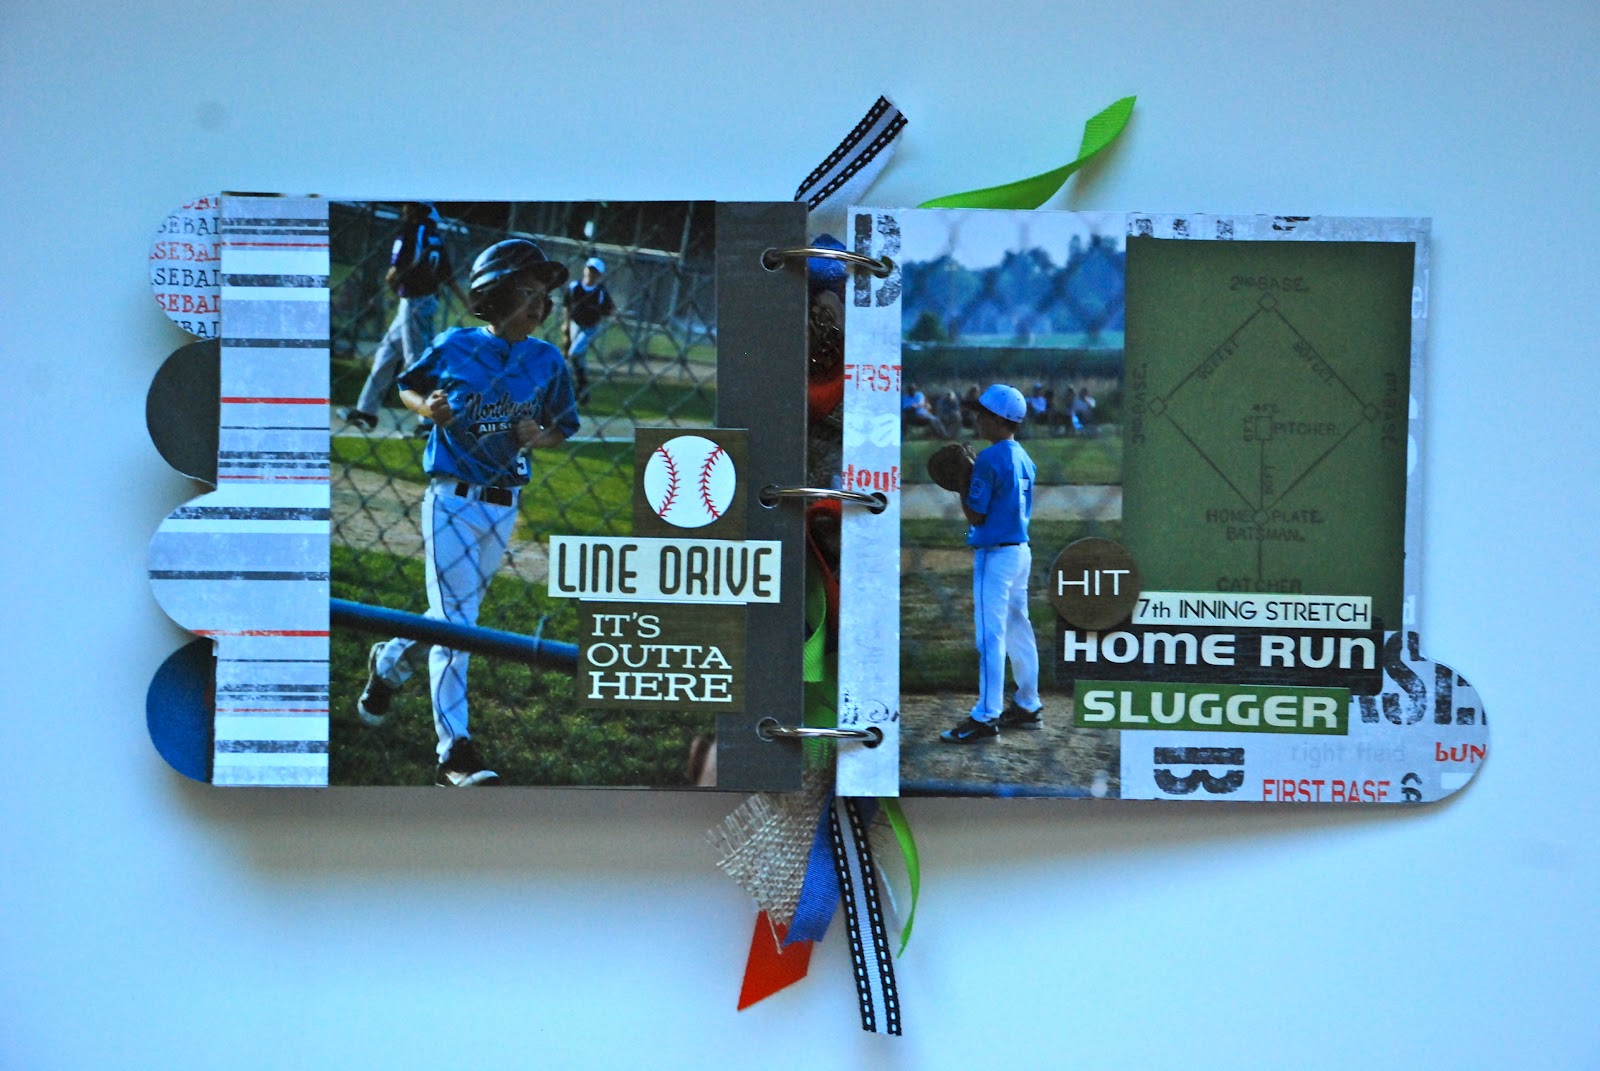
 Don't feel like when you create a mini-album that every page has to be exciting and new. A mini-album, like a children's book with rhymes and pictures, helps the book flow to follow a pattern which makes it enjoyable to read.  You should have a pattern that makes the album flow. Find one technique that you love and use it throughout the book. This will also help with getting the album completed because you are not taking the time to decide on each page what new technique you want to try. In this book, I used the sticker sheets & journaling sheets to make a word collage on each page. The words highlight the pictures and create the 'flow' I want throughout the book.
So that is my Ode to Mini-Albums! I love to create them and feel that they are some of the highlights of my crafty life.
Have you created a mini-album before? What is your favorite mini-book you have created and what did you love about it?

I haven't done a giveaway in a long, long time. To celebrate my move to Texas and all thing mini {albums}, leave me a comment & I am going to DRAW A PRIZE WINNER for a box of craft goodies that I will send to the lucky winner. If you have never created a mini-album, leave a comment or question and I will answer it the best I can. A winner will drawn from the comments on Sunday, April 22nd at 7 pm CST.  {This is not in affiliation with any company, etc. This is just from little ol' me who has lots of fun crafting supplies! The album pictured was a gift, so this is NOT the prize. But the prize IS a box of crafty supplies!}

Wednesday, April 18, 2012

{show choir & a card...

Sketchbook 4.3
A few nights ago, I couldn't sleep so I took a bunch of scraps & made six cards. This was one of them....I think I have a new obsession for washi tape. It is the perfect embellishment. 

Wednesday, April 11, 2012

In The Net - Photo Decor Project

I found this piece of artwork at Target on clearance a few weeks ago & thought it would be perfect to display some of Christian's soccer photos in his room. I had looked at purchasing a soccer mural from somewhere, but the one I really like I could not find anywhere {Basic Grey, did you ever produce your soccer mural??} I printed a bunch of soccer photos from last season and placed them on the board to get an idea of what pictures went well.
I then trimmed the photos. Some were also cut into circles to fit inside the circle design on the art piece. I still use my Fiskars circle cutter. I have had it forever and it does the job for me. I also wanted the edges of the pictures to be a little distressed, so I ran my Fiskars scissors over the edges to 'rough them up' a little bit.
To add a title, I used Pink Paislee wood letters blended with Fired Brick & Black Soot distress ink.

I then used Mod Podge to adhere the photos and Zip Dry glue for the wood letters.
This full project was completed in just a couple of hours. When the boy came home from school he was thrilled with it. That is all the compliment I need. It will look great in his room. Now every time I am at Target I will be looking for clearance art pieces!
Thanks for taking a peek at this project. It is the first of many that I am trying while figuring out what to do with all the walls in our new home.  It is fun to add 'a crafter's touch' to each little corner, in some way, and make it our own.

Friday, April 6, 2012

Wednesday, April 4, 2012

Related Posts Plugin for WordPress, Blogger...